
I added a simple DIY wood countertop to our laundry room and today I’m showing you how it’s done!
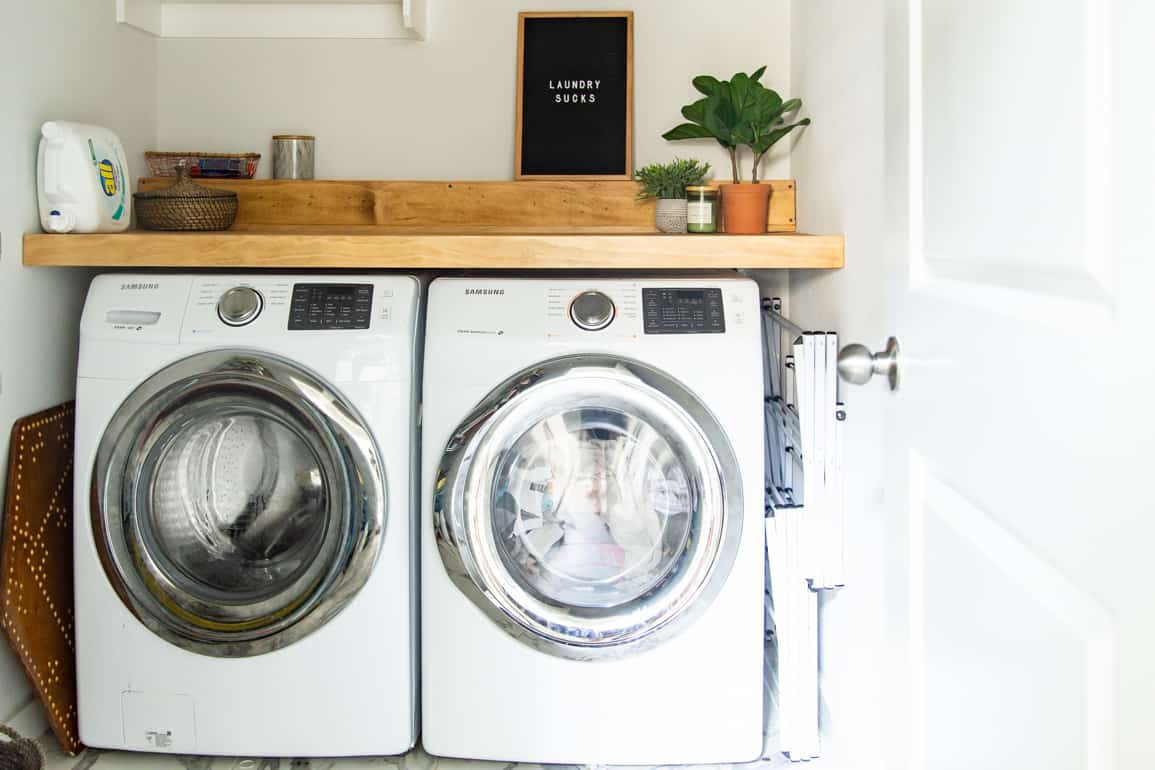
It’s officially time to dive into our little laundry room makeover and I’m so excited to share our DIY laundry room counter with you today – this was such a quick and easy project to knock out and it’s going to make a world of difference in how functional this space is!
Plus, now that the counter is done I can start tiling the back wall as soon as the tile arrives later this week, and you know that makes me really excited!
If you aren’t caught up, I shared all of the plans for this little laundry room makeover on the blog last week. I’ve been spending way more time in here than normal since we’re all at home all the time now, so I figured it was high time I turned it into a space that functions a little better for our family (because those before photos are painful).
This was a pretty simple project (made slightly more complicated by the quarantine and the fact that we couldn’t shop for supplies in person) and I promise that anyone can tackle this DIY laundry room counter!
how to build a diy laundry room countertop

tools & materials
Note: The amount of wood you need will vary depending on the size of your laundry room and how large you want your counter to be. I’m listing what I used to build our 66.5″ long counter, you can adjust as needed for your specific space!
- (2) 2x4s, ripped in half lengthwise
- (3) 1×12 pieces of select pine
- (1) 1×3 piece of select pine
- Kreg jig + pocket hole screws (this is a cheaper version if you’re on a budget!)
- Power Drill
- Nail gun (learn how to use one and which one to choose right here)
- Stain (I used Summer Oak mixed with Golden Oak)
- Varathane’s Triple Thick Poly
- High quality paintbrush
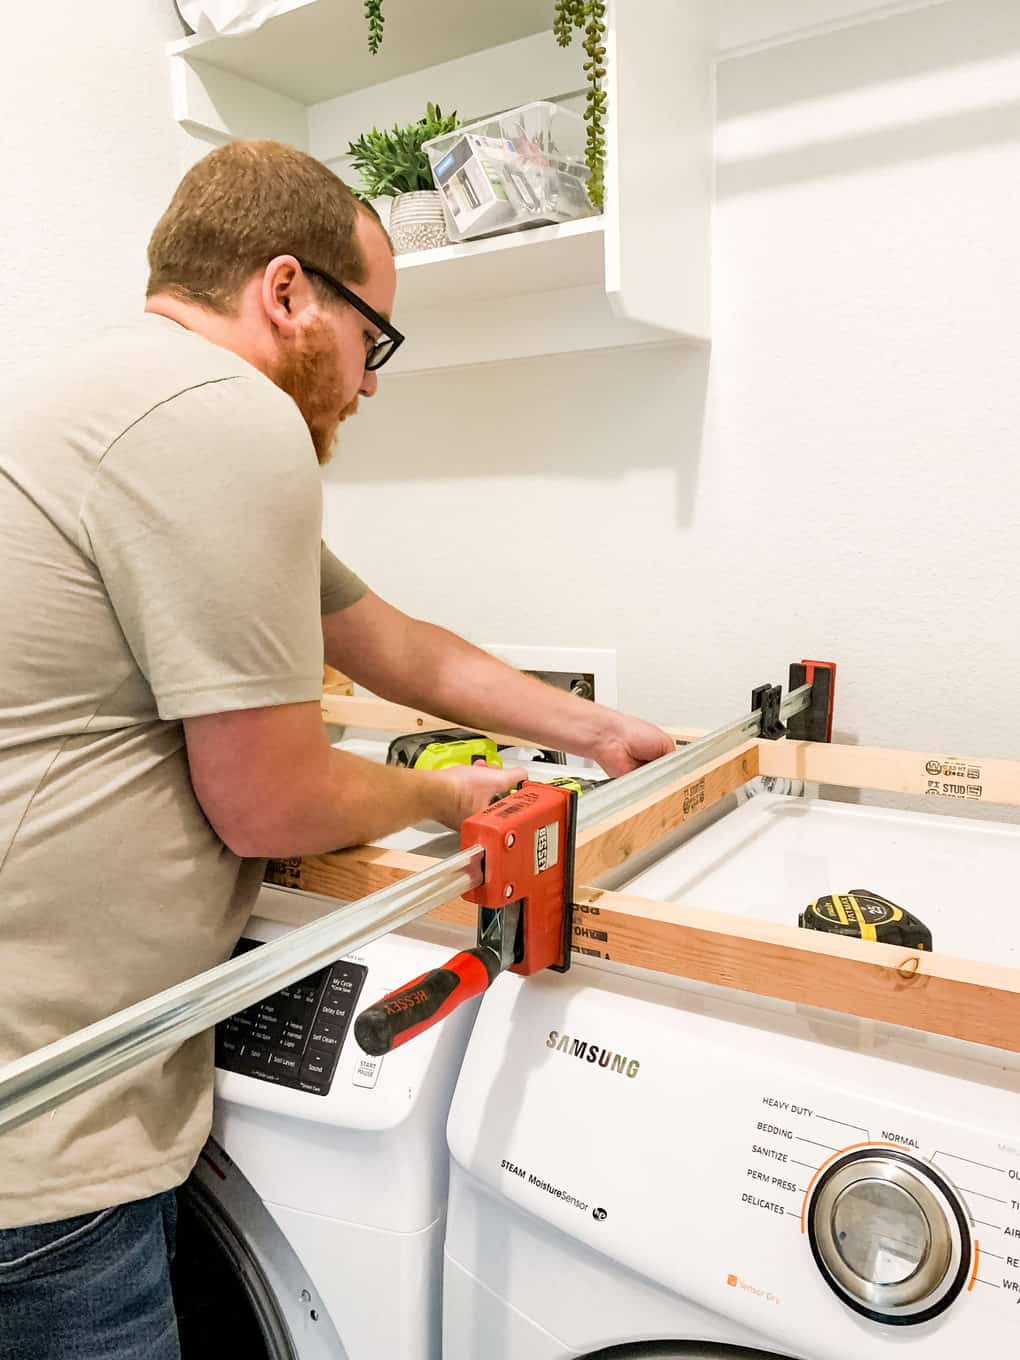
frame out your supports
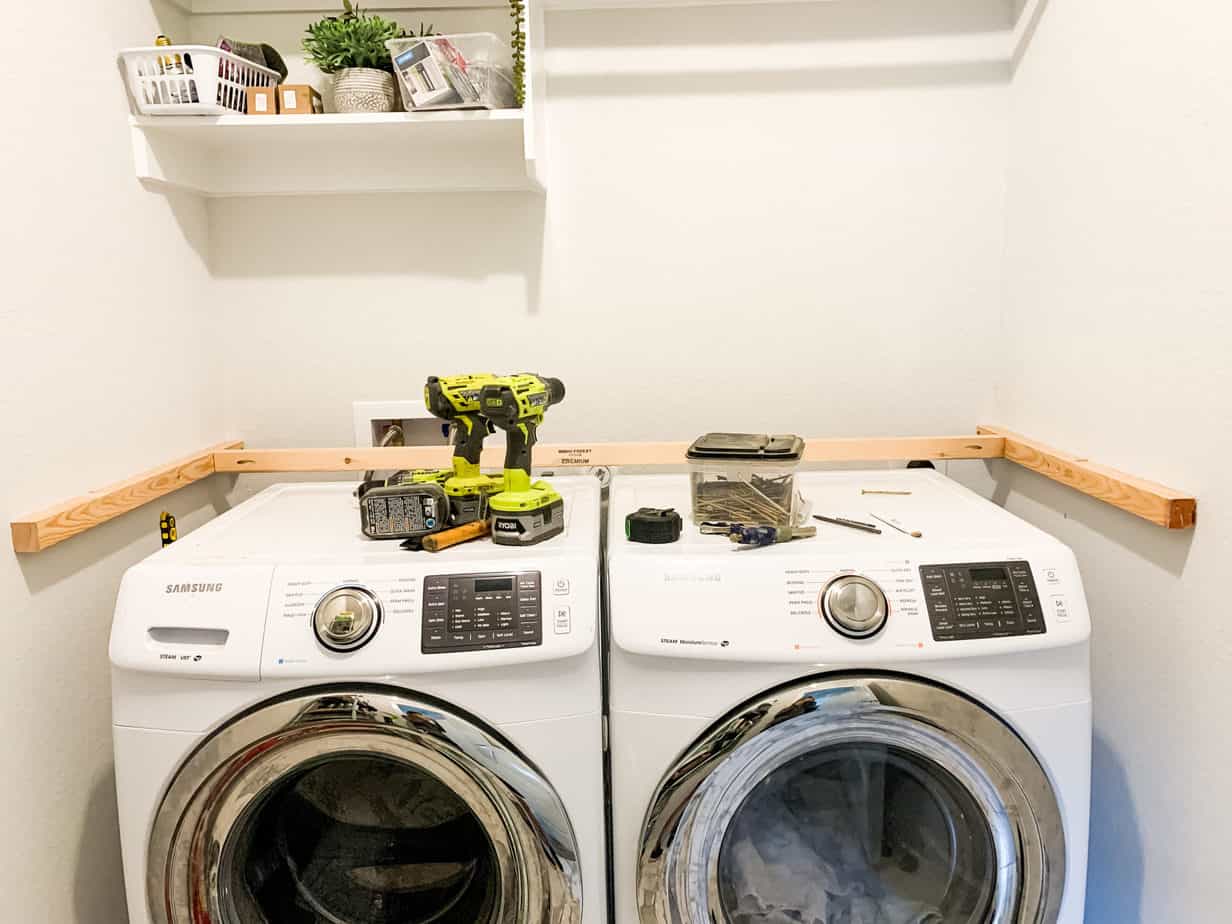
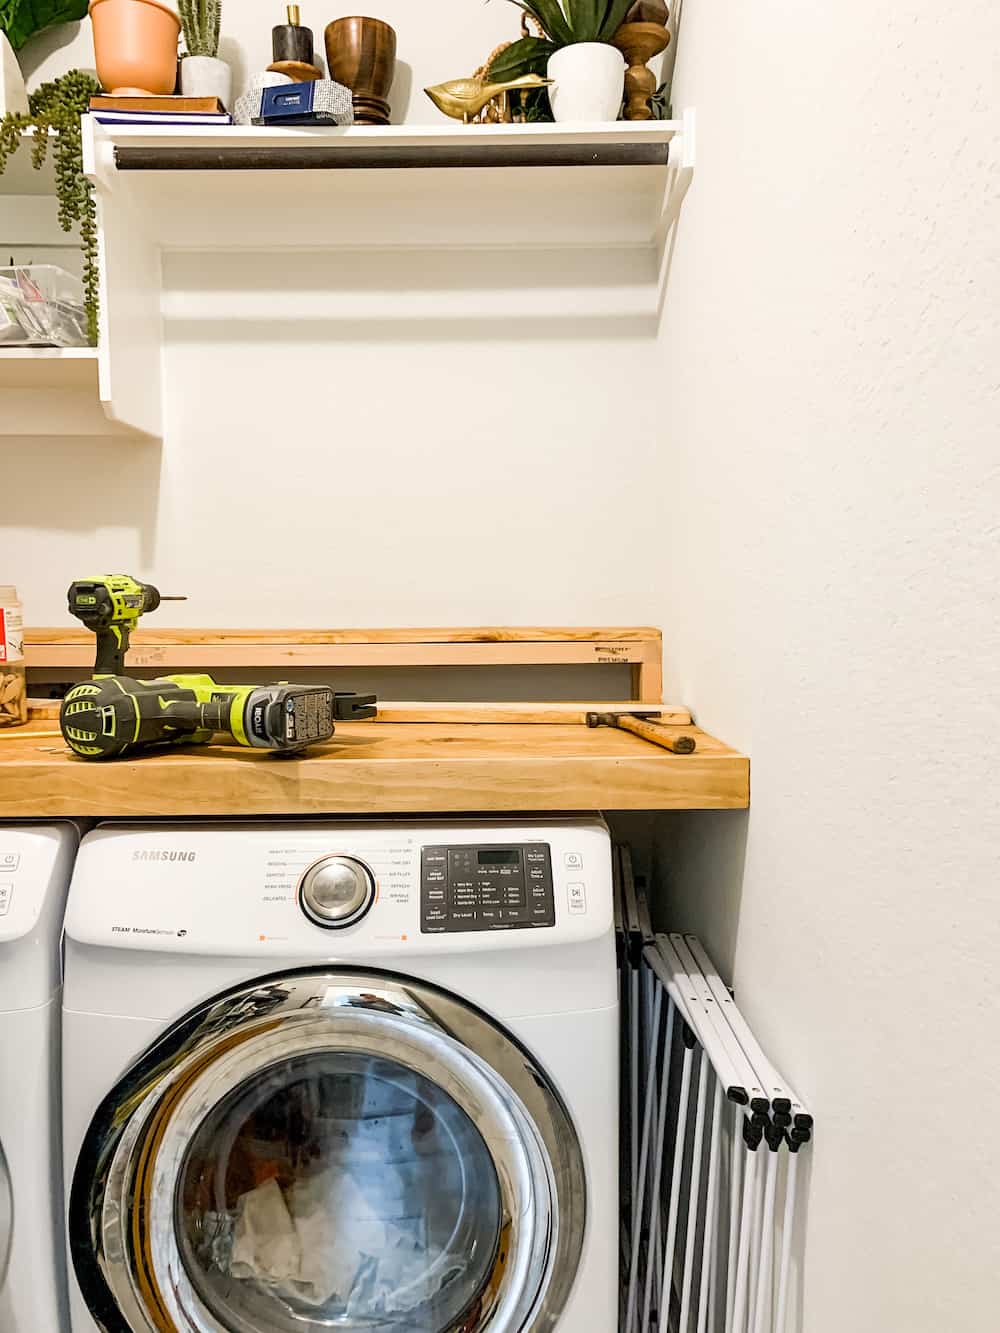
You’ll start by installing all of the supporting pieces (they’re called ledger boards) that will help hold your counter up. We used 2×4 boards that we ripped in half (so they wouldn’t be visible once the counter was installed).
We started with one piece on either side of the room that ran the depth of the counter (drilling into studs wherever possible), then we used pocket holes to attach one long piece going between them.
Note: When you’re measuring the height of your counter, double check that your soap dispensers will still open once the counter is installed! Our completed counter sits about 1/2″ above the washer to ensure it wouldn’t block anything.
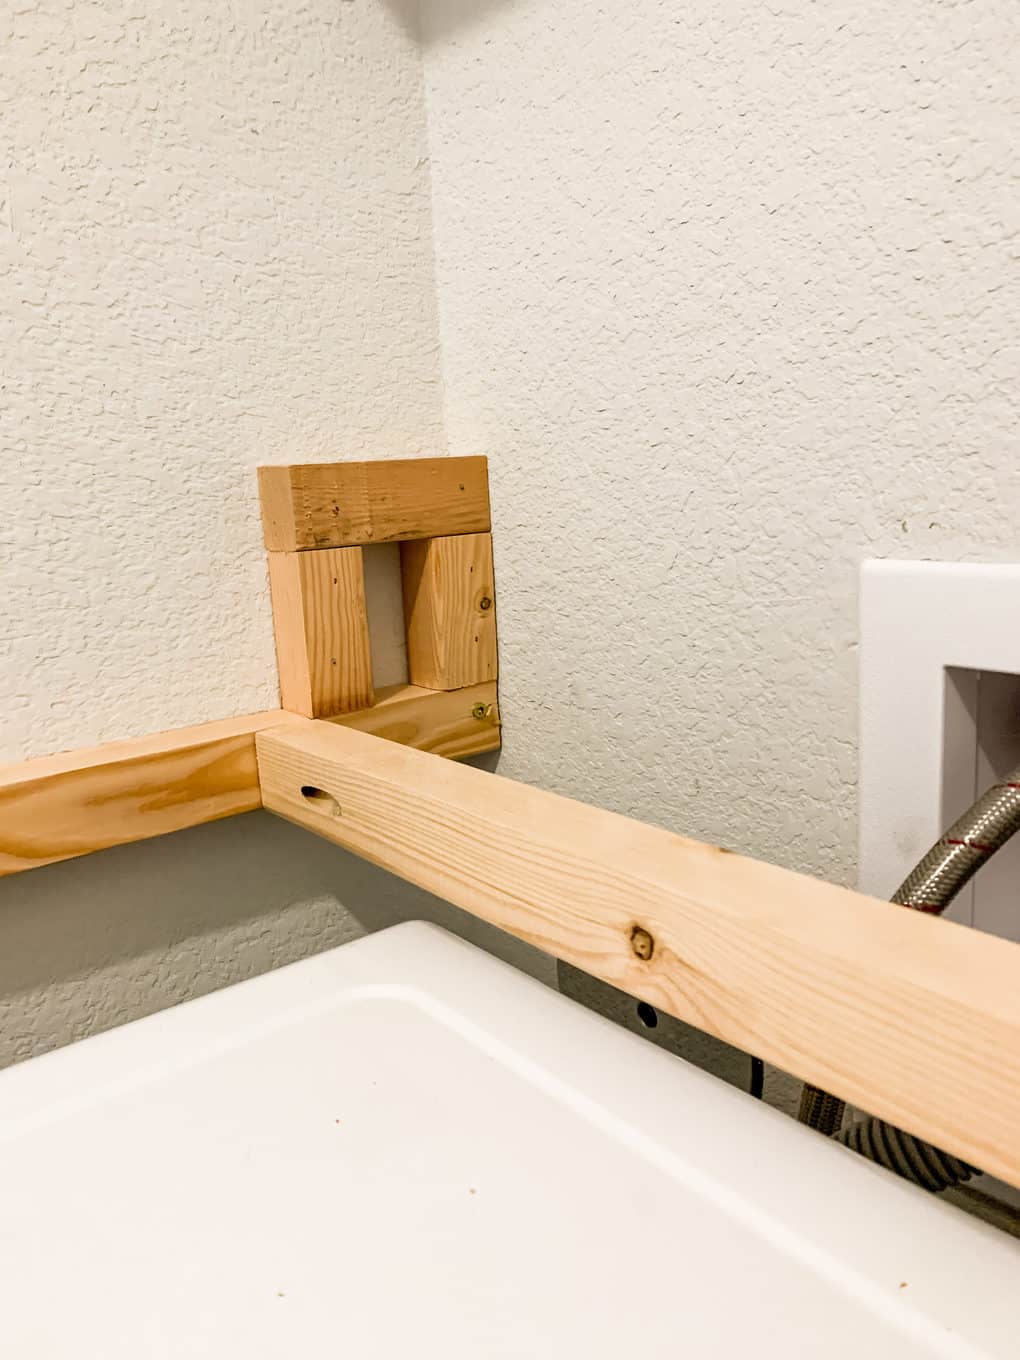
You’ll note that our counter didn’t go all the way to the back wall – we added a ledge. This is because the controls for our water shutoff valve sit slightly above the washer and dryer, and blocked us from going all the way to the wall (you can see it in the before photos). So instead, we built a little ledge (with a removable front piece) to hide them.
If you don’t have anything blocking your way like we did, it’s even easier – simply install a ledger board along the back wall by screwing it into the studs. You can skip the pocket holes and your counter will be even sturdier than ours is.
I didn’t get a good photo of it (because we added it further along in the process), but we also ended up installing one more support piece running along the front of the counter – also using pocket holes to install it, along with a middle piece. So, the base of our counter is supported by what looks like two side-by-side squares (which you can kind of see in the photo above).
(Optional) Add the supports for a ledge
You may not need a ledge if you don’t have shutoff valves or other controls blocking your way. But, if you still want one, there’s no reason not to install it! I’ll note that if you don’t have anything blocking your way, I’d recommend taking your base counter all the way to the back wall and then building the ledge on top of it. It’s much easier and will be sturdier in the long run.
But if you’re like us and didn’t have that option, here’s what we did:
We used more 2x4s (also ripped in half) to frame out the size of the ledge. Subtract 3/4″ from the size you want your ledge to be, and that’s the size your support boards should be – for example, our ledge is 5″ tall and 4″ deep, so our support boards are 4 1/4″ tall and 3 1/4″ deep.
We used construction adhesive and nails to attach these to the wall as shown. Not pictured is the long support board that we attached at the front of the ledge using pocket holes. This adds structure to the ledge and gives you something to nail into! It should just run the length of the counter, just like the cross pieces from the base counter!
cut + stain your counter pieces
Determine how deep you want your counter to be. Our washer and dryer have slight curve to the front, so we measured from the wall to the widest point of the curve, and had our counter end about there.
We ended up needing two lengths of 1×12 boards and one length of 1×3 board. We could have ripped them all down to a uniform size before joining them together (so there wouldn’t be one small piece in the middle), but we decided it wasn’t worth the extra effort.
We used pocket holes to attach the three pieces together. Move slowly, clamp them together, and check regularly that they’re all flush and level as you work!
Once your counter is assembled, you’re ready to stain it. We ended up distressing ours (watch my Instagram story highlight on this project if you want the details on why and how we did that), and then I stained it using one coat of Summer Oak by Varathane, with a light coat of Golden Oak on top.
Once the stain was dry, I sealed the whole thing with one coat of Varathane’s Triple-Thick Poly. It’s my favorite to use for projects like this because it only requires one coat, it goes on like a dream, and it works perfectly!

At this point, you can go ahead and cut your front trim piece (from your 1×3 board) and the pieces for your ledge.
The ledge pieces can be ripped down from your 1×12 boards – we needed one 5″ piece for the front, and one 4″ piece for the top of the ledge.
assemble the counter
Once your pieces are all stained and sealed, you’re almost done!
Start by bringing the countertop piece in, and laying it on top of the support boards. We simply nailed ours into place with our 18-gauge brad nailer.
Then, install your front trim piece along the front of the counter to cover up the support boards. Again, we used our brad nailer.
And finally, you can install the ledge pieces if you’re doing a ledge. We nailed the top of the ledge into place, but we used screws on the front of the ledge – this is so the front piece is easily removed if we need to access the valves at any time. We’ll just need to pull the screws out, and the board will come right off.
And then, you’re done!
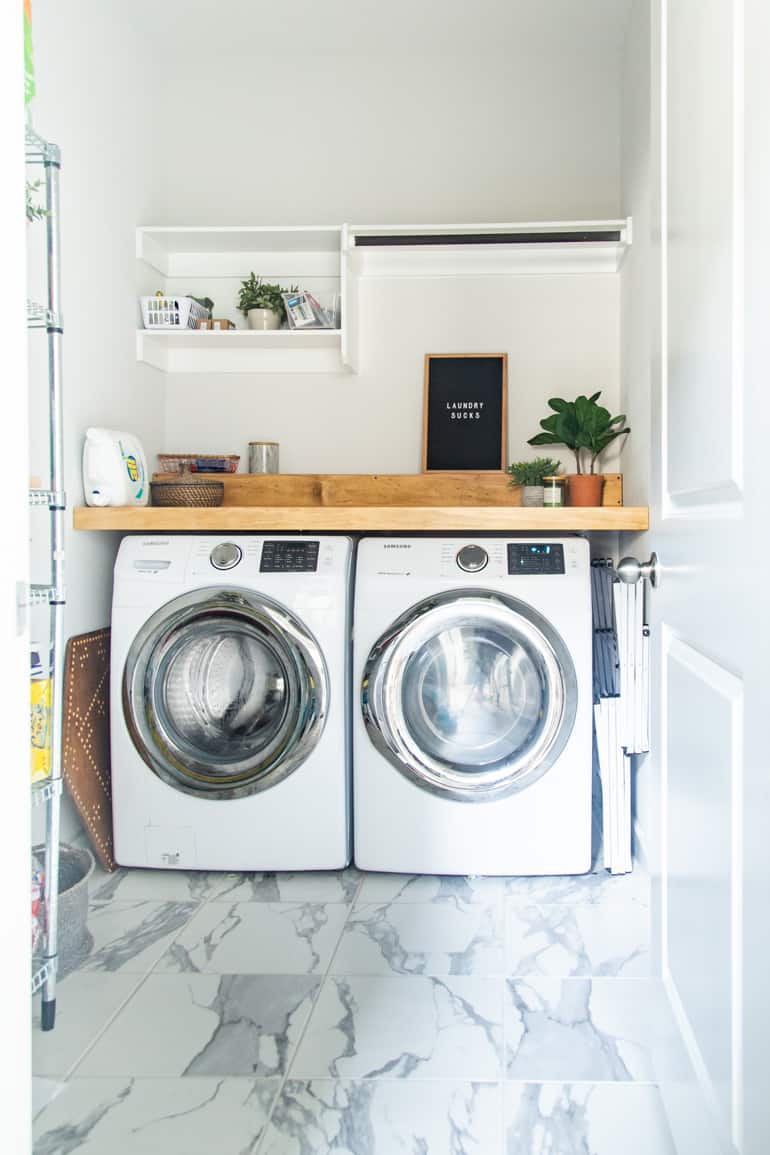
This little counter of ours is far from perfect – we ended up with warped wood, we made a few mistakes, and we couldn’t head back to the store for more supplies. But I’m really pleased with how it turned out, and I kind of love it for all of the flaws because it will forever remind me of this wacky, difficult-yet-special time of quarantine.
The next project on my list is removing all of that shelving so I can begin tiling! I’ll be installing some new open shelves above the washer and dryer once the tile is installed, and I’m so excited to see this come the rest of the way together!
Here are a few related posts that you may find helpful if you decide to tackle this project:
The post DIY Wood Laundry Room Counter appeared first on Love & Renovations.