
By Dad, How Do I?
.
.
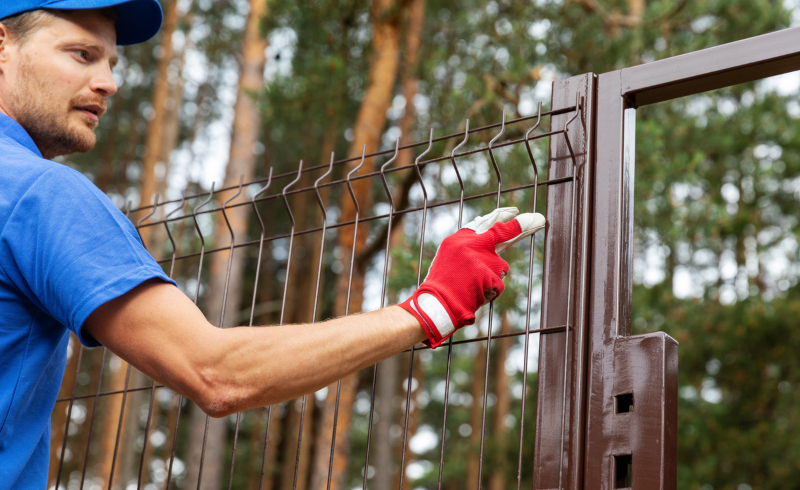
How to Install a Gate – Sponsored by Adjust-A-Gate
Here is the link to order a gate and get 10% off with free shipping;
https://thelifetimefence.com/dad-how-…
Enter to win one of 3 gates that we will be giving away by tagging a friend on my Instagram page.
Blessings,
Rob
Transcript provided by YouTube:
hey kids nice to see you again so
today’s video is
is sponsored by adjustagate they reached
out to me and i thought it’d be a
perfect fit for my channel
because um in my book i do show you how
to build a cedar fence
but then gates can be a little tricky if
you try to build that from scratch
and they’ve made it pretty simple and
it’s long lasting
and i’ll walk you through that whole
thing uh but first
i have a dad joke for you so have you
noticed that
squirrels and birds are very indecisive
yeah they’re always on the fence ah so
anyway
let’s get started so a couple things i
forgot to add about this
uh with adjust the gate one of the
things i asked them to do is could we do
some giveaways
uh with this gate and they agreed so
we’re gonna give away
three adjuster gates uh so
to enter you’ll need to go to my
and tag a friend it’s as simple as that
that way we can
uh draw the names from that and uh then
adjust the gate i’ll let them know and
they’ll ship you out
your free gate uh and then also
as an added bonus too there’s gonna be a
link in the description
with uh and you just click on that it’ll
take you there
and then you’ll use the um code dad how
do i
and you’ll get 10 off and free shipping
if you order
a gate from them direct so anyway just
want to throw that out there
uh as an added bonus for you
okay so one thing i always like to do
and i’ve done this in other videos it’s
always good to just get
everything out of the box and just look
at it
familiarize yourself with the different
pieces there’s only
a couple pages of instructions it has
other
languages so that’s why this is so thick
but really it’s just that that
and that okay so i just think it’s
important again to just kind of walk
through kind of familiarize
what’s going on here you are gonna need
two two by fours for the cross pieces
okay this is just the frame
the nice thing about this again is that
uh it’s not going to sag on you if
you’ve ever made a gate
and you put in that uh that cross
piece that kind of runs on it over time
those just sag
they just do you know the the gate sits
out in the weather and they just
they just sag and so this thing is
pretty slick
it actually has this adjustment here to
keep it from sagging if it starts to sag
you just tighten it up a little bit
pretty cool uh so yeah so you’re gonna
need
two two by fours one for the top one for
the bottom and then you also need your
fence
uh your fencing too that’s going to be
attaching to this as well
uh so anyway i just kind of walked
through it got myself familiar with it
one thing very cool
i love it when they make it as simple as
possible they have
each bag is numbered one
two three four five
it just makes it so much easier
sometimes yeah you know you get all
these bolts and stuff and it’s like okay
i hope that’s the right one and they try
to show you
a picture of it with a certain size or
whatever boy dummy proof it for me it
just makes it that much easier so
anyway now that i’m familiar with it
we’re gonna go outside and
install it okay so it tells me to locate
the center point
on my post my post actually extends up
above and then i got a little
bridge going across to the other side so
i’m just gonna call
this the top right somewhere in here
okay
something like that okay so i’m just
going to figure out where the center
point is
about 71 inches so what’s half a 71
quick 35 and a half okay so 35 and a
half
i’m gonna come down here to 35 and a
half
all right so this was my center point
right here
i measured down 16 inches to there and i
measured
up 16 inches to there from this center
point okay
and the brackets are going to go on here
and on here
so i made the mark on the outside here
okay
and then you can just double check this
to make sure you’re good
just 16 plus 16 is what 32
so then you just measure this overall
length in your 32 just as a way to
double check it
okay okay so i’m going to actually drill
pilot holes
because i think that that always makes
things go better if i tried to put
this is a fairly thick screw if i tried
to put that in there it’s going to
spread and things might splinter so i
want to remove some of that wood i don’t
want to remove too much of it because
you want these to hold
but we’re just going to drill a pilot
hole with uh
a drill bit that’s a couple sizes
smaller than this
okay so i’m just going gonna do
this might not be enough but see that
how it’s just
it’s thinner than the than the actual
screw
can you see that yeah so that way it’ll
just remove some of the wood out so
things don’t
splinter right if i just tried to drive
that in there it might actually crack
the wood
okay so i’m going to go ahead and mark
these first
i’m just going to put this on up here
i’ve got a guy
chainsawing and a guy doing leaf blowing
i think
so i’m battling them now that i’ve
removed my gate but anyway i’m just
going to mark these okay
i’m just going to mark where i’m going
to put those pilot holes
okay
there we go i can see him see him see
him see okay so
i’m just gonna go ahead and
okay then we’ll
i’m just going to kind of show you what
i’m doing one one of them
[Music]
don’t need to go through all of them
with you but just so you understand what
we’re doing
[Music]
see that way it removed some of the some
of the wood from in there so that
might need to go up just uh i don’t want
to go too big because if you do it too
big then it’s gonna
you know they’re not really gonna grip
so i’ll probably go up uh one step
and i’m gonna do that for all four of
those and i’m gonna do it for all four
of those before i actually put in the
in the screw okay i went up one size on
my drill bit
and so we’re just going through each of
these and
okay
just to remove some of that wood out of
there okay
okay now we’ll go ahead and attach
[Music]
okay and remember how i said that these
things are labeled
this is the screw that you want that’s
going in here it was bag number one
and they call them screw j
okay so this is how these should
actually go these just wrap right around
here
okay so we’re gonna go ahead and put the
top one on and then we’ll put the bottom
one on
all right so this is the upper one so
this is facing down
right so that’s the upper we’re just
gonna go ahead and finish it off
okay now we’ll install the bottom one
right so this is the bottom one and this
peg is sticking up
okay so i’ve already put in the other
screws i’m just gonna finish it off here
okay now we’re we can go ahead and uh
put the first frame on
okay so now it says to loosely attach
these hinges
to the hinge what does it call it
hinge side of the gate frame
okay
now i always like to just tighten it up
just by hand with this just to make sure
okay
okay that looks good
all right same thing on the bottom
okay and one little
make it snug here
okay that looks good
okay now it says to attach these and
basically you’re just gonna
slide you can see how it’s got a wrap a
curved part on it can you see that
yeah okay so that’s just gonna slide
right in here
it’s only gonna go one way you can’t put
it in any other way
that’s gonna slide in there and that’s
just gonna be able to be a you know you
can adjust it for the size of your game
okay and then we’re gonna do another one
for the
to the bottom
okay so now next step okay
so it says within one inch here so we’re
just gonna go
again things are real rough right now
loose so you just gotta be careful
okay so we’re just gonna kind of get it
over there close okay
okay so now i’m going to decide um how
long my two by fours are going to be
and so basically you want to go an inch
over here okay an inch away
i just want to get an inch slide it
there
okay and that’s where my that’s where
i’m going to measure my 2×4
okay
come over here it looks like it’s about
40 47.
i’m gonna go 47 first and then that one
i can always
take a little bit off looks like 47
though
all right so i’m going to attach the one
on this side
you have too fight it a little bit to
get it in the right spot
beautiful okay now i can tighten down
the other two
and i’m gonna do the same thing to the
to the bottom board okay
okay now let’s see this this is sliding
still so and there’s three screws
underneath here
three holes and basically just i would
want to get that
roughly in the center right
so kind of slide it around
okay i’ll go ahead and i’m gonna attach
the other two and then i’m gonna do
the same thing at the bottom okay now
we’re gonna attach
this it’s gonna go diagonally and they
say to go ahead and open this up all the
way so you want to get this
wide open right just loosen this up
because then that what that will do for
you when you do want to tighten this
it gives you some wiggle room right if
these were already closed and then you
installed this and then you needed to
tighten it there’d be no room for it to
to move so we’re going to go ahead and
loosen up that one too
all right i just wanted to show you that
before oops i’m actually tightening that
i want to show you what that looks like
before before i installed it
okay because you want a big gap here so
that you can
adjust it later all right so then they
give you this little
uh clamp here and basically you just
kind of get it
close where you want it and then you
just loosen this up
okay loosen these nuts on here and then
you just
slide that right through that’s what i
ended up doing see that i just slid it
right through the
hole there okay so then i’m just going
to go like this
tighten it back up get it pretty close
and then i’m just going to tighten these
i’ll need to grab a little socket here
to tighten it all the way i’m just
trying to get it hand tight for now
this is kind of slick it’s a cool little
adjustment that you’ll be able to make
over the years if things start to sag a
little bit all you got to do is just
tighten that turnbuckle and then that’ll
pull that
pull the sag out of your fence of your
gate
okay so we’re pulling this tight looks
like this is an eight millimeter
so we just want to tighten that up good
so it’s close
and then we’ll tighten it up with that
turn buckle
okay
make sure that’s tight so it’s not
slipping right
okay looks good and then we’ll just snip
this
extra off
okay we’re getting close now the last
thing we want to do
is the the latch so we’re going to we
decide where we want to put that
and then you have these self-tapping
screws
that basically you just put wherever you
decide you want them
okay i’m going to go ahead and
attach it there so it’s kind of like a
screw
that screws in and then and then it
screws up
you know it taps it and then it screws
all the way in
so you can see you gotta have a little
bit of patience and maybe even slow it
down just kind of
work your way with it okay so that’s
where we’re gonna want
want the latch and i’ll go ahead and do
the other one
so there’s actually two more here and i
might go ahead and do those as well
so basically we’re just gonna figure out
where that’s gonna hit
somewhere right in there
okay i’m gonna mark these and then put
up a pilot hole
on it looks like that looks about right
so right in there
drill pilot hole for those first and
then i’ll
open it back up and then i’ll drill
pilot holes on the side so let me go
ahead and
let’s see here
take that off i can see where my holes
[Music]
are
okay so we’re super close now all we
gotta do is put our
fence boards on so here we go so this is
how this looks
nice nice and clean okay
and it just swings back
nice i’m just go i’m gonna go ahead and
attach those fence boards now
okay so this is my board just sitting on
the ground here
so i’m gonna have to trim it i’ll
probably trim
about an inch off i think because i want
to make sure
that it doesn’t drag because it opens on
the inside
and i’ve got cement on the other side so
there’s no give there’s no wiggle room
okay i’m actually changing my mind here
i was actually thinking i was gonna cut
this board
but i think what i’m gonna do is i’m
gonna lift it up about an inch inch and
a half
and then i’m going to have it come here
and then i’m going to actually put a
little just a tiny subtle arc on it just
to see how that looks
um because worse comes worse i can just
remove the boards and
just cut it off straight but i think
we’ll just see what that looks like
um yeah it’ll just be a nice subtle
uh little arch and that way it’ll come
actually back down to where it’s
it’s fairly close to what that looks
like right so
we’ll see how that looks okay i’m just
going to go ahead and start
putting these up lining up the top and
yeah and then we’ll figure out what the
arch ends up looking like
you know you get to pick what you want
it to look like too here
okay and you don’t need to leave a gap
here because
uh these boards will end up shrinking
and they’ll
they’ll leave a little gap i’d like to
pinch them as close as possible when i
put them up
i just use one screw too
okay so i’m just gonna go ahead and
finish this up
all right so i’m using these inch and a
half uh deck screws
that’s what i like to use and i just
used one and i’ve
my other fence uh been up 20 years and
no problem a lot of times you see people
use two i don’t think it’s necessary so
uh i just do one and then this is
actually a cedar board
make sure your 2×4 is meant to be
outdoors if you get one
that’s meant to be indoors then this
won’t last so cedar’s meant to last
uh and inch and a half this is an inch
and a half
this is half inch roughly you know they
kind of vary
uh so you’re gonna get a good bite there
with an inch and a half
okay so i’m just gonna go ahead and
finish this up and then we’ll we’ll
probably have to trim a little bit on
the side to
to make sure that it uh it fits
nice and tight for us so here’s another
little trick that i like to
i like to do as i’m doing this it’s
always good
to kind of measure as you’re going along
because then you can see how
what you’re looking like so we can see
it’s about 35 and a half
okay so i’m at 35
about 35 and three quarters at the
bottom so it’s pretty close
but you could if you wanted to i mean i
have a
saw so i can rip it um at the end and
that’s what i’ll end up doing too
but uh you know you can space this out
as you go along to kind of make up
for that uh that gap so that it comes
out and it’s straight at the end
again i like to keep mine tight and i
have a uh
rip saw that i’ll be able to rip the
skill saw
or i even have a table saw two that i
can do and just mark it and then i’ll be
able to rip it that way but if you don’t
you know just as you’re building it
think about that because you can kind of
make it come out the way you want it to
come out
okay and then what i ended up doing as
an added
look is i ended up putting this extra
bracket
across here it’s not needed but i
thought it looked kind of cool my wife
thought this was cool with these little
um nails kind of rough nails and we
painted them black
just to add a cool little uh look to it
i ended up putting that
uh that arch on it i thought it would
just give it a nice
cool touch you could just leave this
board straight if you wanted to
uh but that frame you know once you got
that frame there you can kind of
get as creative as you want to and i end
up buying these handles too those don’t
come as a part of it because
that way you can get whatever handle you
want to use and so this is how this
works on this side so it just
just lifts up like that pull it shut
pretty cool right so since it’s this way
on my gate
it’s on the left hand side i’m lifting
up if it was on the other side
you’d push down right just because that
that would be flipped
and here’s another thing that we added
to ours
is this little hook right here that
isn’t a part of it
but it’s it’s kind of a security measure
we put a cowbell
kind of cool my wife came up with this
so so that every time
somebody opens the gate the cowbell
rings
so
right so that way you know if somebody’s
coming in your gate
so anyway you don’t need to do that and
then i also when i added the handle i
ended up
adding a board here so that i could have
a handle on both sides
right because this board would be too
thin if i had to handle those screws
would come through so i added this board
right here
uh it’s a one inch a one by four and
it’s just in there so the other one can
screw in from both sides
all right so i hope that was helpful for
you uh
yeah that that gate should last a very
long time and then you just
if it starts to sag you just adjust it
with that turn buckle and tighten that
up and pull it up just a little bit i
don’t imagine you’ll have to use that
uh too often um but yeah you have that
adjustment as well
so uh yeah don’t uh don’t forget to
enter um by going to my instagram
and tagging a friend and then also
remember to check out that link if you
don’t win then you can buy
or yeah buy the by the gate and
then get 10 off and free shipping so
anyway i hope that was helpful for you
thanks for watching and god bless you
—
This post was previously published on YouTube.
***
You Might Also Like These From The Good Men Project
 Compliments Men Want to Hear More Often Compliments Men Want to Hear More Often |
 Relationships Aren’t Easy, But They’re Worth It Relationships Aren’t Easy, But They’re Worth It |
 The One Thing Men Want More Than Sex The One Thing Men Want More Than Sex |
 ..A Man’s Kiss Tells You Everything ..A Man’s Kiss Tells You Everything |
Join The Good Men Project as a Premium Member today.
All Premium Members get to view The Good Men Project with NO ADS.
A $50 annual membership gives you an all access pass. You can be a part of every call, group, class and community.
A $25 annual membership gives you access to one class, one Social Interest group and our online communities.
A $12 annual membership gives you access to our Friday calls with the publisher, our online community.
Register New Account
Log in if you wish to renew an existing subscription.
Need more info? A complete list of benefits is here.
—
Photo credit: iStock
The post How To Install a Gate [Video] appeared first on The Good Men Project.